CreamAPI is arguably a popular DLC unlocker. Today, we will walk you through how to use CreamAPI to unlock the DLC of just about any game.
CreamAPI is a third-party software tool that is used by many gamers to unlock downloadable content (DLC) in video games. It works by bypassing the DRM (Digital Rights Management) protections placed in the additional content of many video games, thereby allowing users to access the DLC (downloadable content) without purchasing them.
From The Sims 4 to Cities Skylines, Dead Rising 2, and more, CreamAPI is capable of unlocking the DLC of many video games, but utilising it can be a little tricky. This is where this article comes into play. So without further ado, here’s how to use CreamAPI to unlock the DLC of any vanilla game.
How to Use CreamAPI
For this tutorial, we will use the video game Muse Dash to demonstrate how to use CreamAPI. So let’s go ahead and use CreamAPI to unlock the DLC (downloadable content) for this game.
- To begin with, download the latest version of CreamAPI, which as of writing this article should be CreamAPI_Release_v4.5.0.0_Hotfix.rar.
- Once downloaded, extract the .rar file using WinRar or 7-Zip and make sure to input the password cs.rin.ru when prompted.
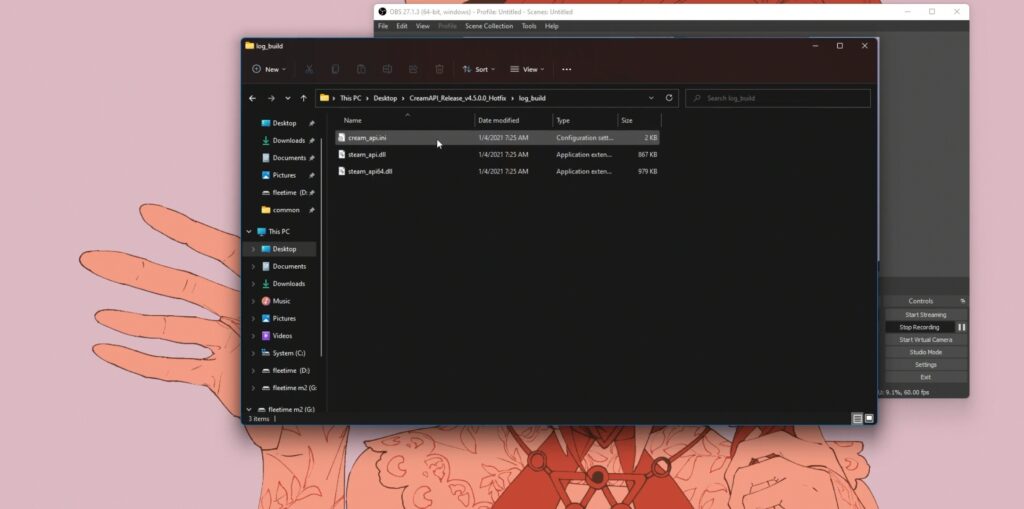
- Now open the extracted file and double-click on the log_build folder to reveal the following files: cream_api.ini, steam_api.dll, and steam_ap64.dll.
- Next, open File Explorer and locate your game installation folder. Since we are using Muse Dash to explain how to use CreamAPI, the game’s installation folder on our PC is in the following directory:
D:\Game\Steam\SteamLibrary\steamapps\common\Muse Dash\Mush_Data\Plugins
- For other games, navigate to;
Steam\SteamLibrary\steamapps\commo\GAME NAME
- From here, use the search bar at the top right to lookup steam_api, then right-click on the search results and select Open file location.
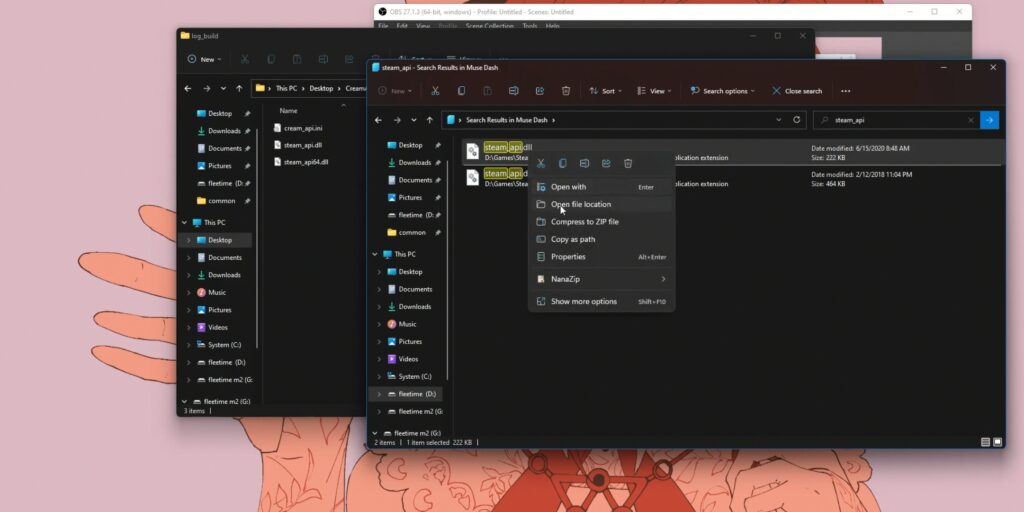
- Now rename the steam_api.dll in your game folder to steam_api_o.dll. Once that’s done, copy these two files (cream_api.ini and steam_api.dll) from the extracted CreamAPI folder and paste them in your game folder.
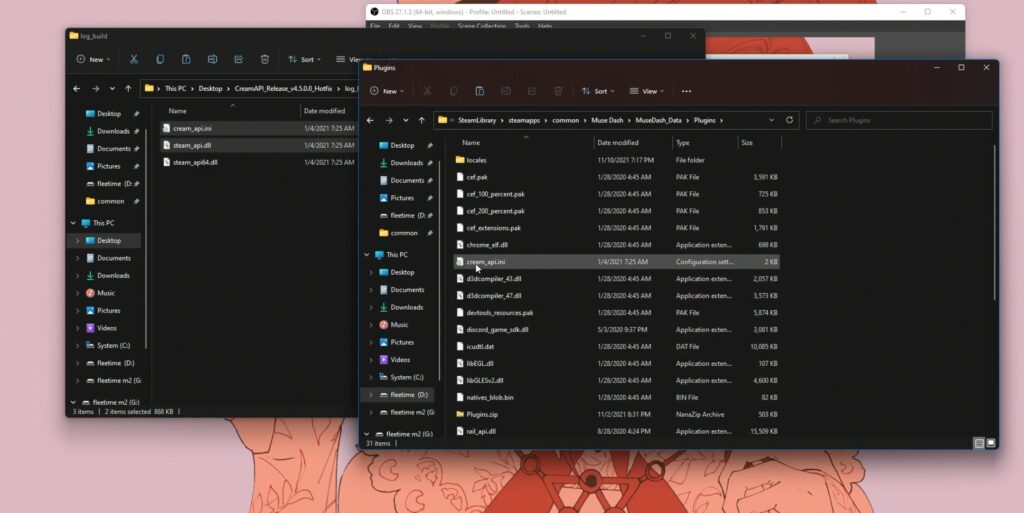
- Now in your game folder, right-click to open cream_api.ini using Notepad or similar software.
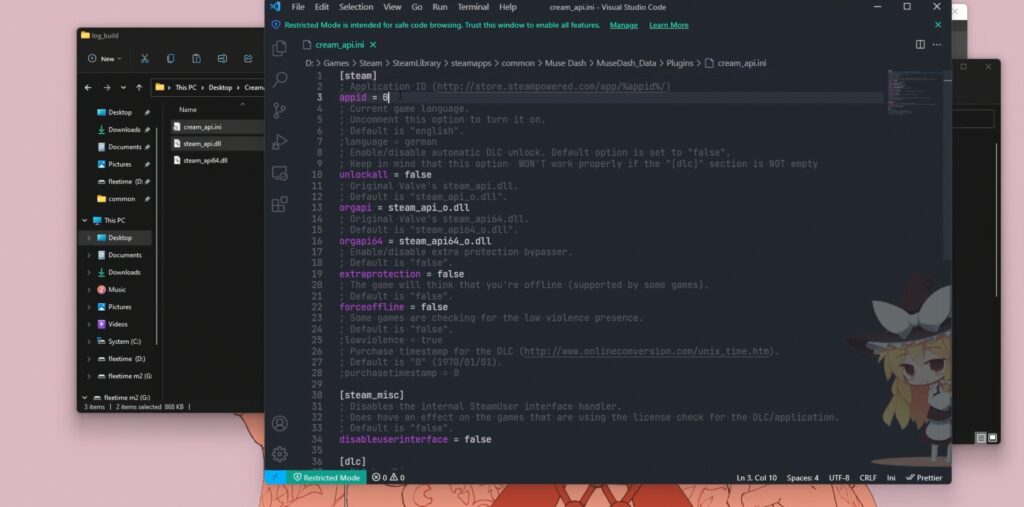
- Next up, head over to SteamDB.info and search for the game you’re looking to unlock its DLC, then copy the game’s App ID. In our case, we’ll look up Muse Dash.
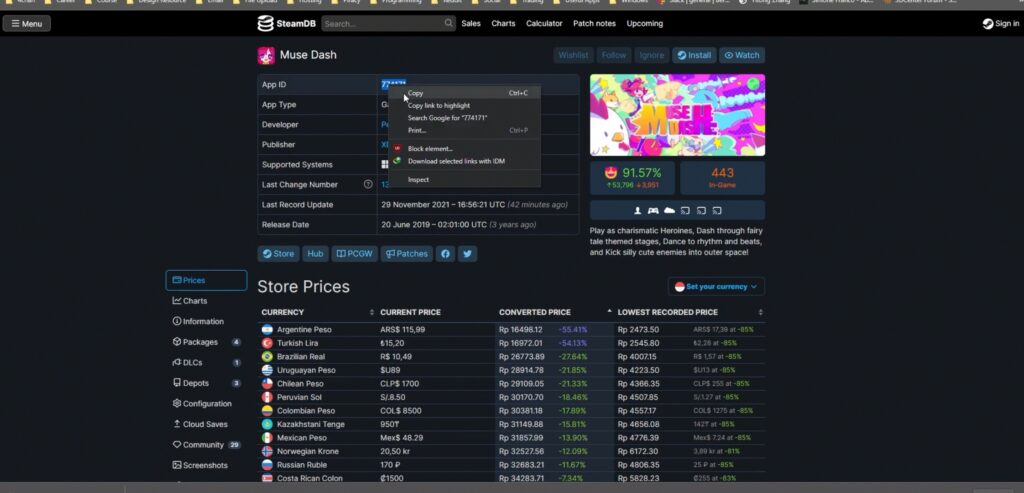
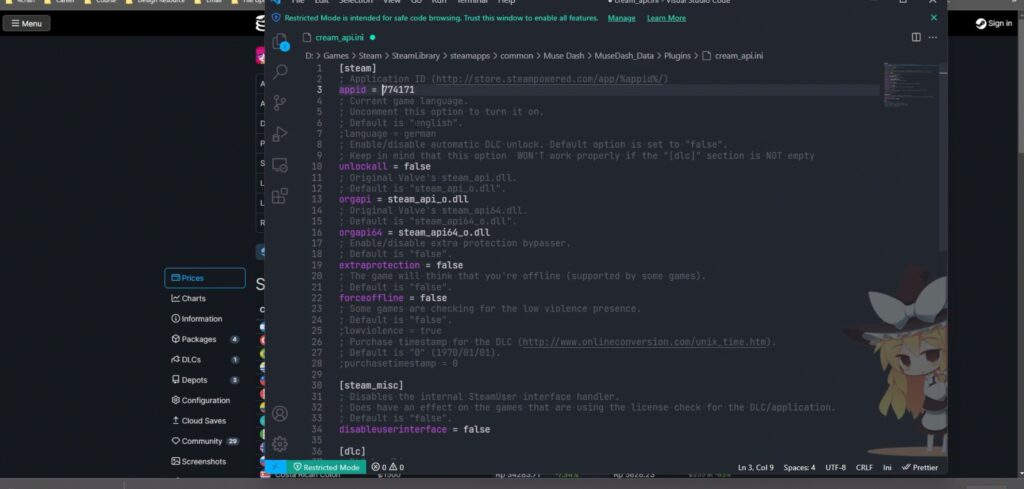
- With the App ID now in your clipboard, open up the Notepad app housing the cream_api.ini data, then delete the 0 beside appid and paste or replace it with the App ID in your clipboard.
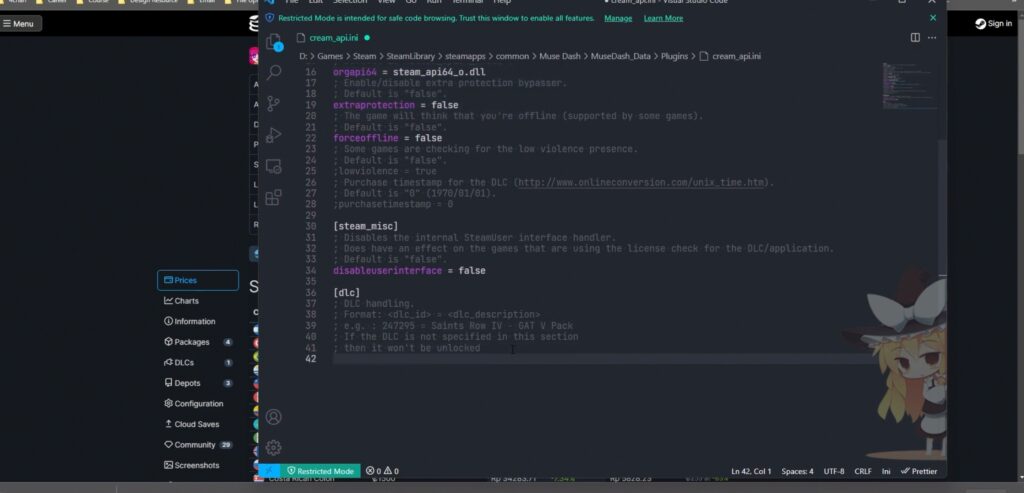
- Now within Notepad, scroll all the way to the bottom and insert a new line.
- Once this is done, head over to SteamDB.info once again and look up the DLC for the game you are looking to unlock.
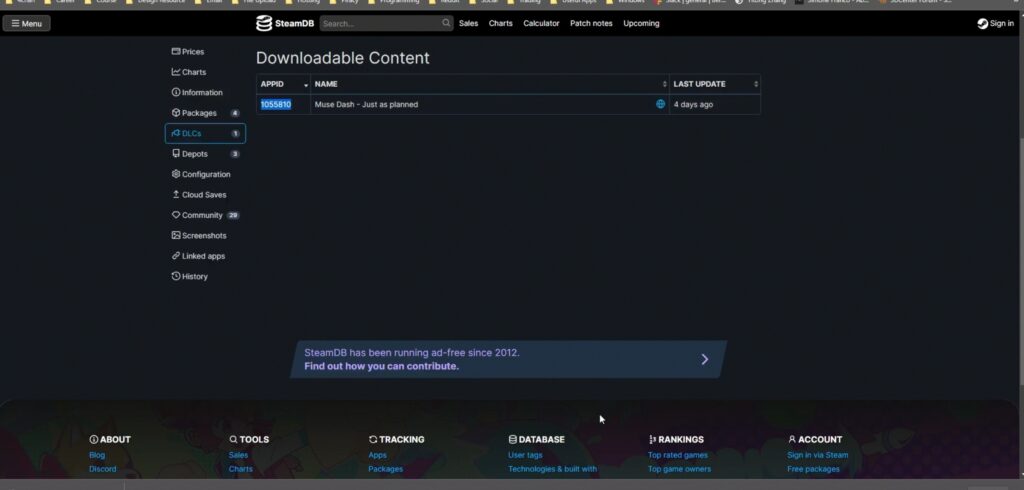
- Once found, copy the game’s DLC AppID and paste it directly at the bottom, in the new line you inserted within the cream_api.ini data opened via Notepad. With that done, add a space, followed by an equal to (=) sign beside the AppID pasted just now.
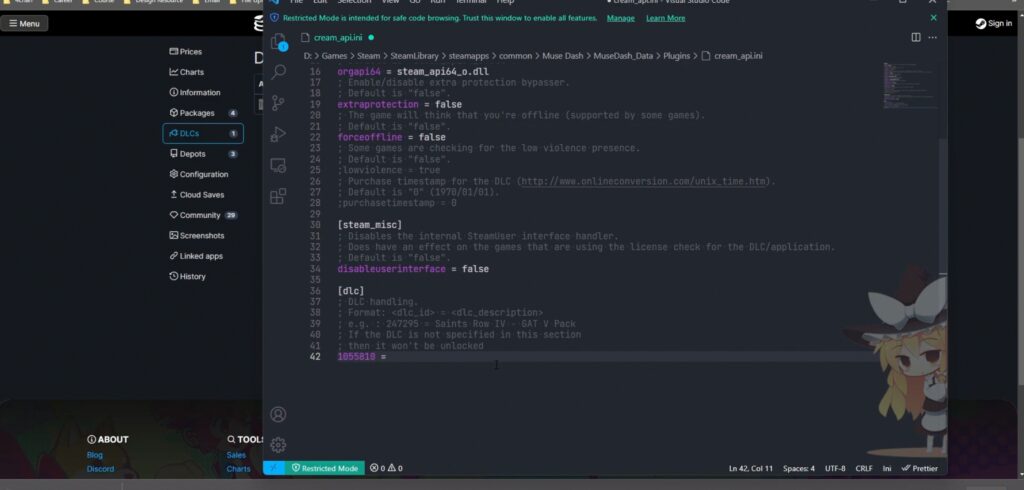
- Now go back once again to the DLC page of the game you’re looking to unlock on SteamDB.info and copy the name of the DLC (Downloadable Content), then paste it beside the AppID as shown below;
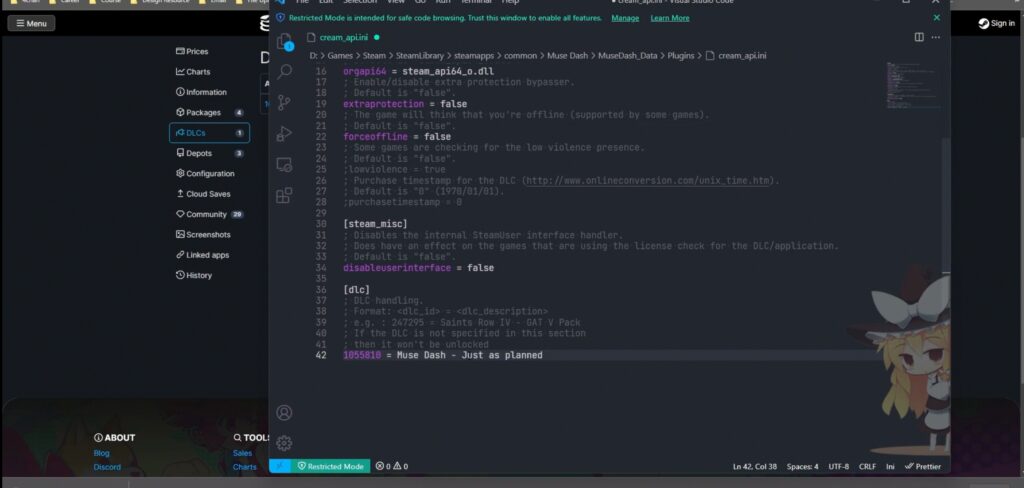
Note: You can repeat this step to unlock all the DLCs you want. Just add a new line, look up and paste the DLC AppID and Name as described above, save your changes, and that’s all.
- With everything done, click on File at the top left corner of the Notepad software and save your changes.
- Now head over to Steam and open the game you just unlocked its DLC, then download the content without paying a dime.

Wrapping Up
So these are literally the steps on how to use CreamAPI. If you encounter any issue while trying to unlock the DLC of your favourite game using CreamAPI, simply use the comment box below to notify us, and we’ll send a response as soon as we can.


1 comment
In the launcher the DLCs appear, but when you open the game they are blocked, I couldn’t see where to download DLCs on Steam, it appears only to buy !