Skyrim Script Extender, commonly known as SKSE, is a third-party tool created by the Skyrim modding community to extend the scripting capabilities of Elder Scrolls V: Skyrim. The tool typically allows modders to create more complex and advanced mods that would be otherwise impossible with the game’s standard scripting engine.
With Skyrim Script Extender, users will be able to enjoy better memory management as it reduces the chances of crashes due to script overload. In addition to this, many popular and sophisticated Skyrim mods rely on SKSE to function correctly, but installing the tool can be pretty confusing since the installation process may vary depending on the version of Skyrim and SKSE you’re using.
Also Checkout: Skyrim Console Commands and Cheats
This is where this article comes into play. So assuming you’re looking to experience SKSE’s increased script functions, memory patching, mod compatibility, and Payrus Extender, then here’s how to properly download and install Skyrim Script Extender.
Downloading the Skyrim Script Extender
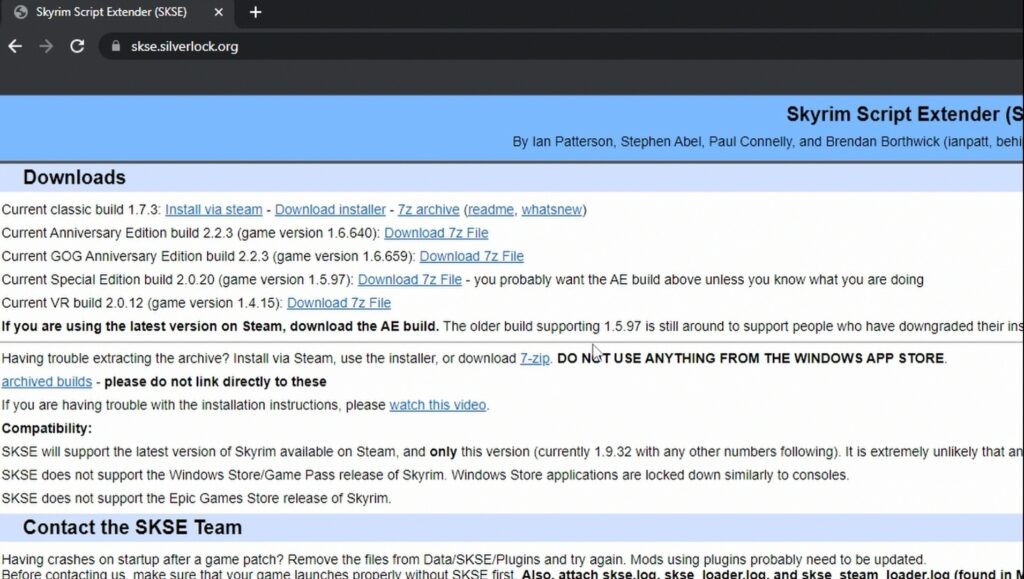
Before we get started, it is important to backup your game before delving into the process of downloading Skyrim Script Extender. Also note that Skyrim Script Extender only works on the Steam version of Elder Scrolls V: Skyrim. With that in mind, open your web browser, go to the official SKSE website (skse.silverlock.org), and download the latest version of Skyrim Script Extender for your Skyrim version.

Please note that the SKSE version must match your Skyrim version. So make sure you have the correct version of Skyrim installed.
Now, for this guide, we will be downloading the Current Anniversary Edition build 2.2.3 (game version 1.6.640) since we’ve got a fully updated Skyrim Special Edition on Steam.
Extracting the Zip File
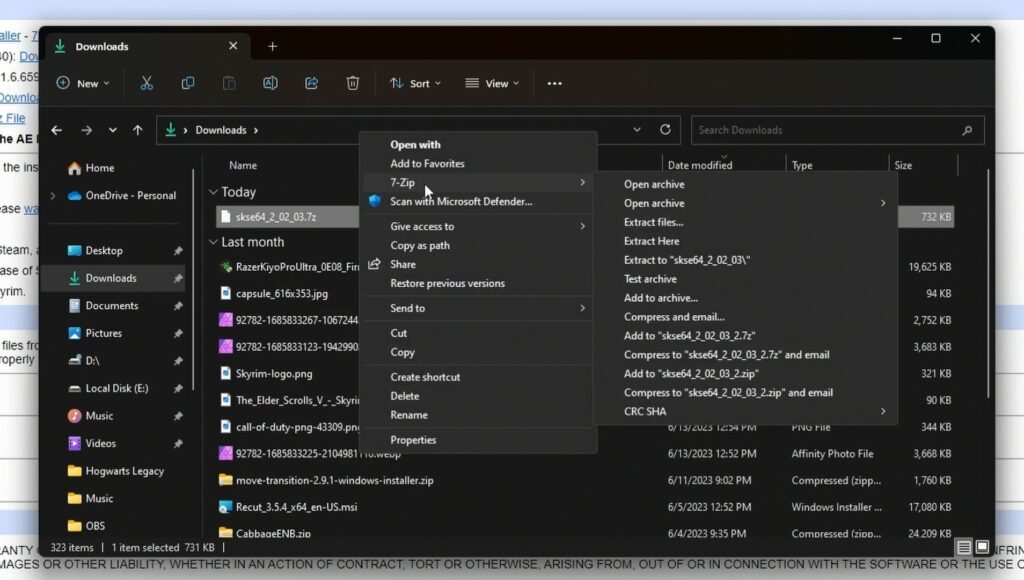
Once downloaded, open up your Windows File Explorer and jump into the Downloads folder. From here, right-click on SKSE and extract the Zip file using WinRar or 7-Zip.

Placing the Content in the Unzipped File in Your Skyrim Installation Folder
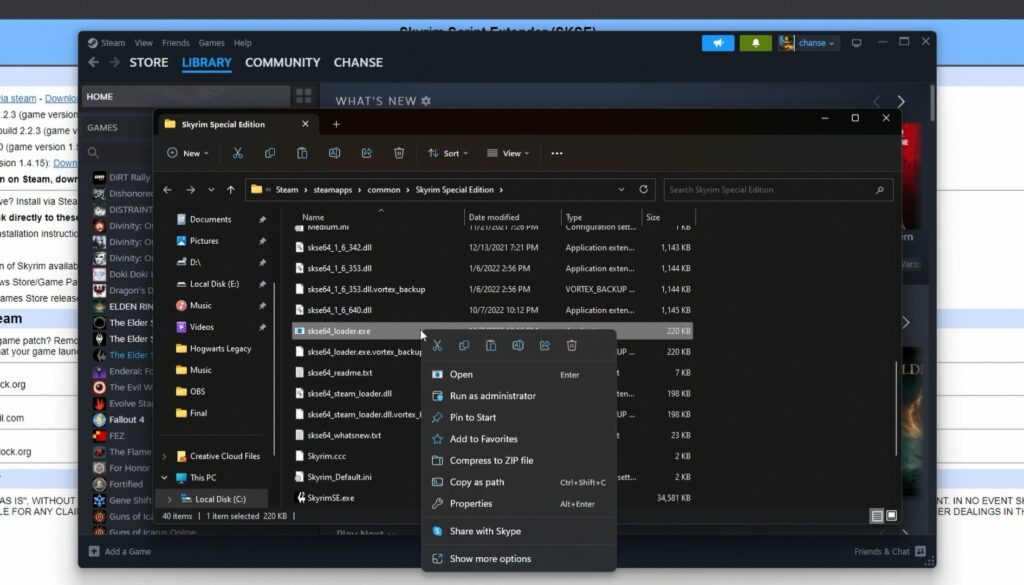
Next up, navigate to your Skyrim installation folder, which by default should be located in the following directory: “C:Program Files (x86)SteamSteamAppscommonSkyrim Special Edition.

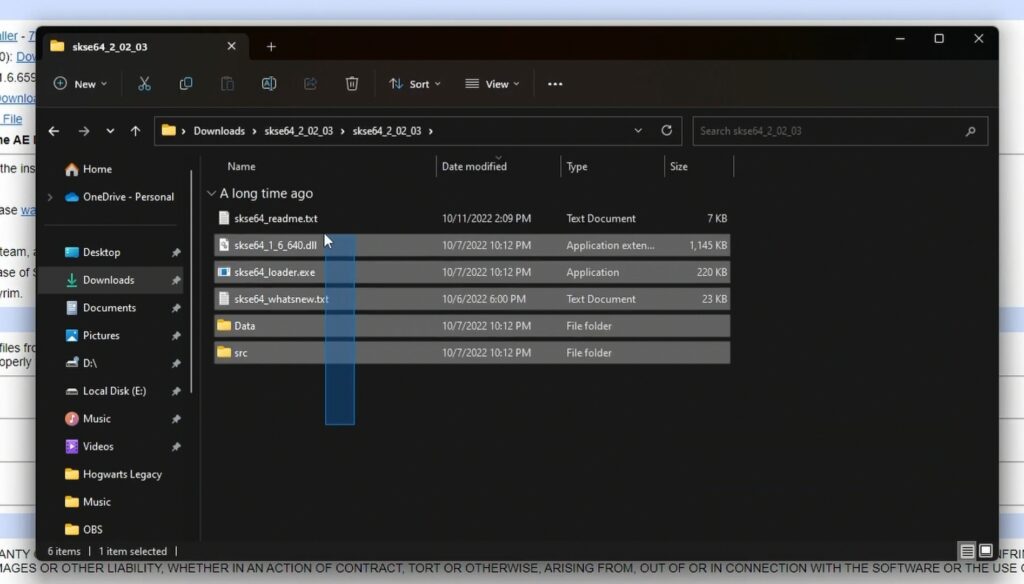
Once in there, open up the extracted SKSE folder and copy the following files and folders into your Skyrim installation folder:
- skse64_readme.txt
- skse64_1_6_640.dll
- skse64_loader.exe
- skse64_whatsnew.txt
- Data\src(folder)
Ensure to click Replace if prompted to overwrite or replace existing files.
Launching Skyrim with SKSE
Now it is time to launch Skyrim with SKSE. To do this, right-click on “skse64_loader.exe” instead of the standard Skyrim launcher or the Steam play button, and then click Open or Run as administrator to jump in-game.

For easy access, you can create a shortcut for “skse64_loader.exe” on your desktop.
Verify Your Skyrim Script Extender installation.
With everything done, you might want to verify the Skyrim Script Extender installation. To get this one going, launch Skyrim via SKSE as described above, and once in-game, open the console (by pressing the tilde ~ key) and type in “GetSKSEVersion” (without quotes) in the search box, then hit Enter. If SKSE is installed correctly, it will display the installed version in the console.
Concluding
With Skyrim Script Extender installed, you can now use mods that require this script extender to enhance your Skyrim experience.

